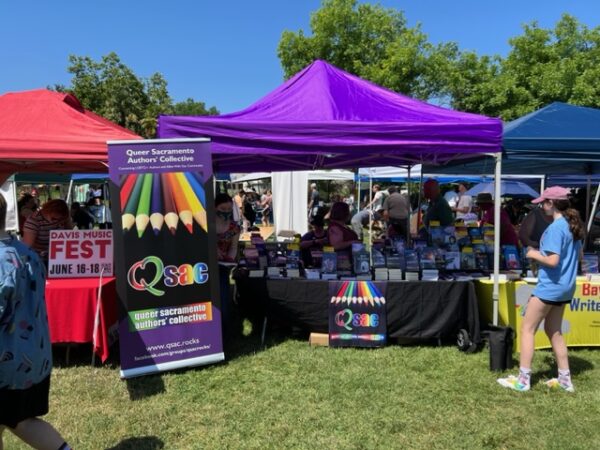
This week I thought I’d do a practical advice column for my writer friends. It’s been a while since I did one of these, and being fresh off of not one but two Pride events, with a third to come next weekend, it seemed like a great time to offer a primer on how to set up and run a group sales table.
Choosing an Event
Big city Prides can be quite expensive. Our local Sacramento Pride festival is now $750 for a booth for two days, and SF Pride is $1600 for a booth, canopy, table and chairs for the weekend. That’s way more than a typical author can afford, but with the right planning, there are ways you can make it work.
First off, gauge interest in selling at the event among the writers in your local queer author community. I run the Queer Sacramento Authors’ Collective (QSAC), and we’re close friends with the Bay Area Queer Writers’ Association (BAQWA), so we have a great pool of authors to reach out to.
The optimal number of authors is 6, and I’d say 8 max for a 10 x 10 booth space. Find out what they are willing to spend (per author), and that will give you an idea about what Pride events you can afford. We typically target events that run $20-30 a person.
Second, find out where all the local Prides are in your area. At QSAC, we tend to do best at the smaller ones. We attended Placer Pride in Roseville in May for its second year in May, and although it’s a fairly small event, the people there were thrilled to have us, and hungry for LGBTQ+ titles. There were only two other sales vendors there (handmade soaps and jewelry/art), so if Pride visitors wanted to spend some money, we were an easy choice.
Finally, don’t write off the big events. Yes, there are many more vendors, but also so many more people who are potential reader-buyers for your booth.
If the Pride booth rate is over your budget, contact the organizer and explain that you are local authors (not deep-pocketed corporations) and ask if there is a discounted rate they might be able to offer you so that you can participate in the event.
Make sure you get firm commitments and payments from your authors before paying for the booth, and let them know their payments are non-refundable so you don’t get left holding the bag if someone cancels. I also recommend adding a small amount to the per-author cost – this year we increased it by $5 per author – to help cover any unexpected events/needs.
What You’ll Need
Make yourself a standard checklist of all the materials you will need at the event. At a minimum, I recommend:
- Your Books
- “Elevator Pitch” cards (to insert in each book with a catchy pitch)
- Book Stands (I love the fold-up wire ones)
- Removable Price Stickers
- Central Sales Method (we use Paypal’s Zettle with an iPad and payment station – running all sales centrally makes it easier on readers and saves paperwork for your participating authors)
- External Battery and/or Extension Cord/Power Strip (depends on if your venue supplies electricity)
- Cash Box (with $200 in $1’s, $5’s and $10’s)
- Canopy (for outdoor events – check and see if the Pride venue offers them first, and what they cost)
- Weight/Sandbags (in case it’s windy)
- Tablecloth
- Large Binder Clips (to secure the tablecloth, unless you get one of those stretchy ones)
- Clipboard/Mailing List Sign-Up Sheet (be sure to follow GDPR protocols for getting permission)
- Pens
- Packing tape
- String/Cord
- Scissors/Boxcutter
- Swag
- Cooler with ice and water (for outdoor events)
- Snacks, Napkins, etc
- Sunblock
Some optional add-ons:
- A tabletop book rack (to increase display space)
- Signage (a pop-up sign, a table runner, etc… Banner Buzz does nice runners fairly cheap)
- A wagon (to haul the materials in)
- “Genre” signs (especially if you have authors in a number of different genres)
All of these things cost money, but don’t be intimidated by this. If this is your first time running a group table, use what you have. You can always add on as you go. For the larger purchases (canopy, signage, etc), ask your group to chip in, with the understanding that it’s a long-term investment that will benefit everyone.
Prepping for the Event
In the lead-up to the event, keep in regular touch with your participating authors. For our local Prides, we usually receive vendor information (rules, suggestions, booth location/map etc) a week or two before the event. Rather than making the authors wade through it all, I have a standard email template I send them that summarizes the important info – what I will be handling, what they need to prepare, their expected booth responsibilities, the drop-off time and location details, etc.
We expect all of our authors to arrive about an hour before opening for set-up. We do a short training on the sales system, and expect everyone to know how to run it. During the event, it’s quite common to have one author running the sale while the selling author talks to the reader and signs their book, so everyone needs to know how to use it.
We also ask that everyone price their books in flat $ amounts, clearly, using removable labels on the bottom right corner of each copy of their books. Keeping this consistent makes it easier on the booth visitor.
We collect taxes inclusive of the cover price (ie: we don’t add it on top), so all sales come out in flat dollar amounts. This makes it much easier to run cash sales, as there’s no coin change involved. But because the tax will be deducted from the cover sales price, we recommend that our authors add a $1 or so to their pricing to make up for it. These taxes and the paypal fees will be deducted from each sale before the earnings are sent to the author after the event.
You may also want to scope out the parking situation and local food options, unless you plan to pack a lunch.
The Paperwork
There’s one more thing you need to do before the event, and I’d recommend tackling it a couple months early – get your paperwork in order. In California, we generally need two official pieces of paper to sell books:
- City Business License: Contact your host city and find out their requirements, Generally speaking, this will run around $20, and may be an annual license or a temporary/event one. That cost should be added to your table cost and shared among all participating authors.
- State Event Permit (Sales Tax): It may work slightly differently in your area, but if your state has a sales tax, you generally need to report that you will be selling at the event to your state sales tax department. In CA, it’s the California Department of Tax and Fee Administration (CDTFA). I have an account there, and I login to create an “event” for each Pride we’re selling at. In January, I report the income for each event and the taxes collected, and pay them to the state (which distributes a portion to each city).
One more tip: When setting up your payment equipment, be sure you get the local tax rate right so you don’t end up owing more or less tax than you collect.
That’s it for today’s column. Next week I’ll cover the event itself and the aftermath. If it seems like a lot, well, it is, but start small and take it a step at a time. After a few of these, you’ll be a pro!
